Saturday, March 9, 2013
Whole Orange Sugar Cookies - Sis 1
I won't lie to you and say that this recipe is good for you, but it is a lot better than normal sugar cookies. It also has a great orange flavor and stays soft and chewy for days (no need for frosting, but you can use it if you want). If you like cakey sugar cookies, though, it may not be what you want.
Whole Orange Sugar Cookies
1 whole orange, washed, but not peeled
4 eggs
1/2 cup canola oil
3 cups white sugar
2 teaspoons baking powder
5 1/2 cups flour
Throw the orange in your blender and blend as well as possible. Add the eggs and blend until smooth. Scrape the orange and eggs into a large bowl, using a rubber spatula. Mix in remaining ingredients. Dough will be very soft. If you want to make drop sugar cookies, do that now. If you want to roll and cut the dough, chill it for at least an hour first.
Bake at 350 degrees farenheit for 8-10 minutes, or just until done. If you wait until the cookies start to turn golden brown, they'll be harder.
Friday, February 8, 2013
Glue Resist Joy Pillow - Sis 1
My oldest daughter was invited to a Chinese New Year-themed birthday party for a girl named Joy. Since Joy is such an easy word to find in Chinese, we just couldn't resist giving her a present that said her name in Chinese. We hurriedly searched on the internet, but couldn't find anything that was suitable on Amazon Prime (comes in 2 days, which is what we had before the party.) So we decided homemade was our option.
I think this would be a fun present for someone who wasn't named Joy, as well, especially if they're interested in Chinese. But, of course, you can use any words or designs you want with this method.
We googled (yes, it's a verb) joy and chinese to find the characters that mean joy. There were several different versions, but this one seemed to be the most common, so it's the one we went with.
First, I we cut 17-inch squares of heavy white cotton percale. Cotton is important because it takes color the best. If you have a pillow form, measure the lengths and add a seam allowance for your fabric size.
Then I printed the character for Joy in Chinese as large as possible on a normal piece of paper. I also found an Asian script-looking font and printed the name Joy in English as large as possible for the other side of the pillow. I used "Calligraph421 BT" which just came with my computer. I wasn't thrilled with the kerning (the distance between the letters--see how the J is a little far away from the o), so after it printed, I folded the paper a little to manually kern the type how I wanted it.
This is difficult to see, but I centered the printouts under the fabric and taped them all to the counter with painter's masking tape. Then I traced the designs with white school glue. The flattened tip of the glue container helped to spread the glue to look like brush strokes. You could also spread it with a brush. Don't get it too thin, though. In the interest of time I used my blow dryer to dry the glue completely.
Then, working fairly quickly, we used a large paintbrush to wet the fabric, saving the glue-covered spots for last. My daughter who is attending the party used watered-down acrylic paints to paint designs on the fabric, being sure to get paint over the glued areas. The idea here is similar to using crayons on paper to resist watercolors. Whatever is covered by the glue (or crayon) won't receive pigment from the paint and will remain white. The richer the colors you use, the better, as they will fade when you rinse it in the next step. We used red and yellow because they look Chinese to us. If I had been the one doing the painting, I would have tried to keep the colors a little more defined, as they came out more orange than I had imagined in my little head, but I do like how it turned out anyway.
As soon as you are finished applying paint, use a blow dryer to dry the glued areas and immediately around them. We went ahead and dried all of both pieces of fabric. Once the paint is dried, rinse the fabric in the sink. You will have to repeat this step quite a few times, until the water is mostly clear. Now transfer the fabric to your washing machine and wash it. I didn't use any detergent. The goal is to remove all excess paint and all of the glue, which will take a little while to dissolve. Once the cycle is complete, make sure all of the glue is gone. If not, wash again. Dry and iron your fabric.
Place right sides together with the characters and the english word both facing toward each other and right-side up. Starting at the bottom, sew all the way around three sides, leaving an open area on the fourth side. I find it easier to sew corners on my machine and leave part of the middle of the bottom side open.
Clip each corner as shown and turn the pillowcase right-side out. Stuff with batting or put a pillow form inside. When using batting, concentrate on the corners first, making sure they look good before adding batting to the middle.
Whip-stitch the hole together, trying to make the seam as invisible as possible. Ta-da! You've made a glue-resist pillow. I'm thinking Tee-shirts would be fun to decorate like this, too.
Tuesday, January 29, 2013
Stinky Laundry? Fix it! - Sis 1
MILDEW
I have been the recipient of a lot of wonderful hospitality in my years, and I'm always thankful to have a nice place to stay, good food and great company when I visit family in far-away places.
But I have to admit that I'm not always so thankful to have a towel to dry off with. There have been numerous times that I have gotten out of a nice shower, hopefully smelling good, and dried off with a towel that reeked of mildew.
A couple of times, I have even babysat a baby who was very fortunately super cute, because I almost couldn't stand to hold her if it hadn't been for that. She smelled (because of her clothes) just like a rotten dish rag.
My husband is not always terribly tactful and has told people that their towels stink, and he usually gets a reply like, "My towels don't stink!" So, you may not know it if your laundry smells horrible. Don't be offended. Just assume that if you are not actively preventing mildewy towels, your towels are stinky. And just washing and drying doesn't count.
If your towels are white, you're in luck. You can use bleach to kill mildew. Always use vinegar in the rinse water.
If your towels are colored, you are still in luck. You can use ammonia to kill mildew. Again, always use vinegar in the rinse water.
If you have a high efficiency washer (HE), you put the ammonia in the little section for bleach* and the vinegar in the section for liquid fabric softener. If you have been blissfully unaware of your stench for a long time, you may need to soak the towels in ammonia water for a few hours, which will require a bucket, sink or tub unless you have a top loader.
For white towels, drying outside also helps, but for colors, you will probably see some fading.
SWEAT
I have been faithfully working out for several months now, but in just the last month and a half, I have really stepped up the intensity of my workouts. I have been soaking my (and my husband's) workout clothes in ammonia water before running the wash cycle. In the past that has always seemed to work, but this morning, when I put on my newly washed exercise shirt, I noticed that I already smelled like a gym rat. (I left it on to go walking and smelled awful--sorry ladies!--but when I got home, I decided to fix that problem, too.)
Here's the simple solution: Get pet urine remover. I got mine from DollarTree. Spray on stinky clothes, making sure to saturate the extra-stinky spots (armpits for me). Wad the clothes into a ball and squeeze tightly several times to make sure the spray is getting into the fibers. Let sit at least 10 minutes. An hour is better. Launder as usual.
SMOKE
A couple of years ago, my favorite black suede (leather) jacket spent a weekend at a chain-smoker's house. When I retrieved it, I thought I was going to die. It had soaked in the smoke and I could hardly breathe, just wearing it. I took it outside and febreezed it, letting it hang in the shade (I didn't want it to fade) for several days. No luck. Then I googled and decided to try freezing it. I stuck it in my freezer for a day and then got it out and let it thaw in the shade. Again, no luck. I was afraid I was just going to have to throw my poor jacket away.
Since I was faced with the prospect of trashing it anyway, I decided I would (gasp) wash it. I used cold water and detergent, plus a good amount of baking soda. That helped, but the smell was still there. So I washed it again, this time with a lot of vinegar (love the stuff!). That did the trick! And, after drying it, in the dryer on low heat, my jacket was just as soft and supple as ever, had not shrunk a bit and smelled good. Yay!
*NEVER mix ammonia and clorox (chlorine). The fumes could kill you. Ammonia and vinegar are fine. Clorox and vinegar are fine. Baking soda and Borax are fine with either one. But DON'T mix them. If you are going to put ammonia in your bleach compartment, rinse it with water first.
Friday, January 18, 2013
Whole Orange Cake - Sis 1
My parents gave us a huge bag of tree-ripened oranges at Christmas time, which are delicious. I put a bunch of them in the fridge, because I was quite sure we wouldn't eat them all before they went bad on the counter. Good thing I did. The last few that I left out were very hard on the outsides by the time I used them. The others are still great, but I don't want them to get bad, so I've been thinking of ways to use them, besides just eating them, which I have been doing, but nobody else in the family has.
So, I came up with a cake recipe. Because what could be better than adding fat, sugar and flour to oranges?
Whole Orange Cake
1 large orange, washed, not peeled
1/2 cup coconut oil
4 eggs
1 3/4 cup sugar
2 c. flour
1/2 tsp. salt
2 tsp. baking powder
Glaze
3/4 cup freshly squeezed orange juice
1 cup powdered sugar
zest of one orange
Preheat oven to 325 degrees farenheit. Put the orange in the blender and blend it up as well as possible. Add the oil and eggs. Now you can blend it up well. Add remaining ingredients a little at a time, blending between additions.
Pour evenly into a greased and sugared bundt pan. I used coconut oil to grease my pan, but the cake didn't slip out very well, so you might want to stick (no pun intended) with Crisco.
Bake 40 to 50 minutes or until a toothpick inserted into the middle of the cake comes out clean. Cool on a wire rack until you can remove the cake easily. (Or use a knife to loosen the edges and make them crumble, like I did.)
Mix the glaze ingredients well in a small saucepan. Bring to a boil over medium heat and continue boiling for two minutes. Remove from heat.
Use a long toothpick or a spaghetti stick to poke a bunch of holes in the cake and slowly pour about half of the glaze over the top. Wait about 15 minutes then slowly pour the rest of the glaze over the cake.
Enjoy your cake while thinking what a great and healthy choice you've made by eating whole oranges for dessert.
P.S. It's just a hunch, but I think lemons would work well in place of oranges here.
Thursday, January 17, 2013
Toothpaste Laundry Magic - Sis 1
Not too long ago, one of my lovely sisters-in-law very kindly allowed me to use her wardrobe for several days. I had driven 5 hours to get near her house and hadn't realized that I had completely forgotten my suitcase. I had always suspected that we wore about the same size of clothes, so I called and she packed me a bag of clothes, including two different choices of dresses and shoes to wear that Sunday. They all fit me well, and I was very thankful not to have to wear the same clothes for 5 days straight.
I washed her clothes in my mother-in-law's washer, except for what I was wearing at laundry time, which included a white shirt with a stain on it. So, as I was washing those clothes out by hand in the bathroom sink, I was determined to get the stain out as a "thank you" for her kindness in letting me borrow the clothes.
This stain was not just any old stain. It appeared to be made by black permanent marker, and I could tell that she had scrubbed the thing before. It didn't show when I wore it, as the shirt was used only to make another shirt more modest, but any stain's a bad stain, right?
I was scrubbing away, not making any progress, when I noticed a tube of whitening toothpaste on the counter. I thought, "What the heck, I'll try it." And it worked.
I told my husband about my discovery on the way home from our trip. He decided to test my findings. He got one of his white dress shirts that had some armpit and collar stains. He scrubbed with bleach on one side of the shirt and toothpaste on the other. (Yes, he does most of his own laundry--we just won't get into why.)
I don't know how he applied the bleach on the one side of his shirt, but I think he just poured it on directly (he IS a man.) Instead of removing his stains on that side, the bleach actually made bigger yellow stains on the shirt (I've had this happen on white cotton towels before. It's very maddening, because it looks like big old pee spots.) The toothpaste removed the stains from the other side of the shirt, and then my husband used it to remove the bleach stains on the bleach side of the shirt.
So, I now have a dollar-store tube of extra-whitening toothpaste in my laundry arsenal. I haven't tried it on colored clothes yet. If I get brave enough to do it, I will update the post, but for now, I have a great stain remover for white clothes.
Wednesday, January 16, 2013
Tea Bag Tanner & Cellulite Cream - Sis 1
I was browsing Pinterest a week or so ago and saw a pin about black tea as a replacement for sunless tanner. I thought that was a great idea, since you can dye a lot of things with tea, so I followed the directions.
I went to Family Dollar and bought some tea. Not being a tea expert, I'm not sure if what I got was what they were talking about when they said to use black tea. It's actually orange pekoe and pekoe cut black tea. It was $1.49 for a box of 100 tagless tea bags.
The directions said to boil 6 teabags with 2 cups of water, wait until the water is cool to the touch and then spray it on your legs with a squirt bottle and let dry naturally. That's what I did. And I liked the color. (On parts of my legs.)
The problem with the spray-bottle method is that you get blotchy color with run lines. That may be slimming, but not natural looking.
So here's my solution. I had used the 6 tea bags, so I had 94 left. I covered them in water in a pot. Then I simmered them until the water was nearly gone and let it cool. Since I didn't want my hands tanned, I put on rubber gloves and squeezed the liquid out of each tea bag and threw the bag away. Next, I boiled that liquid down to nearly nothing.
Once cooled, I poured my VERY strong tea into a bottle of dollar-store lotion and shook well. Now I have a bottle of sunless tanner that goes on colored. You just rub it in (wear gloves) and you don't have to wait for the color to change. You won't have streaks, because you can see the color going on.
And here's the great thing (that's unproven): black tea has lots of caffeine. Caffeine has been shown in some studies to improve the appearance of cellulite. So maybe using your homemade sunless tanner that cost you a total of $2.49 will make your cellulite go away. Happy Day!
I went to Family Dollar and bought some tea. Not being a tea expert, I'm not sure if what I got was what they were talking about when they said to use black tea. It's actually orange pekoe and pekoe cut black tea. It was $1.49 for a box of 100 tagless tea bags.
The directions said to boil 6 teabags with 2 cups of water, wait until the water is cool to the touch and then spray it on your legs with a squirt bottle and let dry naturally. That's what I did. And I liked the color. (On parts of my legs.)
The problem with the spray-bottle method is that you get blotchy color with run lines. That may be slimming, but not natural looking.
So here's my solution. I had used the 6 tea bags, so I had 94 left. I covered them in water in a pot. Then I simmered them until the water was nearly gone and let it cool. Since I didn't want my hands tanned, I put on rubber gloves and squeezed the liquid out of each tea bag and threw the bag away. Next, I boiled that liquid down to nearly nothing.
Once cooled, I poured my VERY strong tea into a bottle of dollar-store lotion and shook well. Now I have a bottle of sunless tanner that goes on colored. You just rub it in (wear gloves) and you don't have to wait for the color to change. You won't have streaks, because you can see the color going on.
And here's the great thing (that's unproven): black tea has lots of caffeine. Caffeine has been shown in some studies to improve the appearance of cellulite. So maybe using your homemade sunless tanner that cost you a total of $2.49 will make your cellulite go away. Happy Day!
Saturday, December 22, 2012
Suncatcher Ornaments - Sis 1
Every year, I like to let my kids make some ornaments and give one to their school teachers, along with some sort of goody for Christmas.
This year, we made suncatcher ornaments. They are SUPER easy and difficult to mess up. My 3-year old made several of these and they're nearly as good as the ones made by my 10-year old.
First buy some transparent plastic beads. I'm pretty sure that any style will work.
Pre-heat your oven to 400 degrees farenheit and turn on the fan.
Now let your kids put a single layer of beads in the metal container of their choice. The round one shown was done in a muffin tin. The heart was done in a metal cookie-cutter sitting on top of a cookie sheet. We also did star shapes, but they didn't come out as well because of all the corners. Maybe if we had put a few beads more than a single layer they'd have filled in better.
Bake your beads in their metal molds for 20-25 minutes. Remove from oven and cool. Pop your ornaments out of the cookie cutters or muffin tins. To get some of the ornaments out of the tins, I had to flip the tin upside down and give it a sharp tap with a butter knife. The rest came out easily.
Now for the holes to string them with: Use a power drill and your least favorite drill bit. Place a piece of scrap wood under the ornament and drill through the plastic. It really becomes more of a melting than a drilling, once the bit heats up. I found it helpful to let the plastic spin through the other side of the hole for a few seconds to remove extra plastic buildup from the drill bit. I also had to pull the plastic from the tip of the bit while it was still warm so that it would work on the next ornament. I broke all of the plastic off of the bit when I was finished, but it wasn't extremely easy.
We put the ornaments around the necks of sparkling juice for our teachers. I wrote "To Mrs. Blank from Child's Name 2012" on the backs (flat, unshiny side) of the ornaments in mirror letters with a very-fine tipped sharpie. You can read it better through the shiny side than from the side you wrote on.
Cold Porcelain Photo Ornaments - Sis 1
This project took A LOT of trial and error. I knew what I wanted, but I didn't know how to get it. I also took pictures of nearly every step, but somehow my SD card is now unreadable, so I only have the finished product to show you. I made a set of ornaments with photos of all of the grandkids for my mom, and wrote their names and the year on the backs. Then I made a set of just my kids for myself, plus a bunch with different pictures of the Saviour that I liked (seeing as how this is His holiday.)
I started out by making cold porcelain. If you've ever made cooked playdough, the process is very similar, but the ingredients are much different.
Cold Porcelain
1 lb white school glue
1 lb cornstarch
2 Tbs. lemon juice
4 tsps. petroleum jelly
Get a medium to large saucepan that you aren't in love with. I was able to get everything off, but I may have been lucky. Put all of the ingredients in the pan and stir over low heat until it pulls away from the sides of the pan and looks doughy instead of gooey. Be prepared to use some muscle. It was not easy to stir this (and don't use a weak spoon.)
Remove from heat and let cool enough that you can touch it without burning yourself. Start kneading. Once the dough is all smooth, roll it out, again, this is difficult, because it's stiff dough. Cut out. I used a vaguely flower-shaped cookie cutter. (If you don't have a cookie cutter you like, you can always make one.) Then I punched holes in every bump with a large drinking straw. I used a slightly smaller drinking straw to punch holes inside the ring of bigger holes. If you wanted, you could use coffee stirrers to make another round of smaller holes, if you wanted.
To use a straw for a punch, the easiest way is to use the bendable straws and cut it off just above the joint section. Press the original sipping end into the dough and hold onto the contracted joint as a handle. To clear the dough out of the straw, stick a toothpick through the joint and push the "holes" out the other side. You may need a couple of each size of straw because they aren't terribly sturdy.
Once the shapes are cut, you can air-dry them for several days or dry them in a 175 degrees farenheit oven for a couple of hours. Either way, turn them over once in a while, because they start to curl and you want these flat.
Here's where the adventure started. I wanted to print photos and transfer the images directly onto the ornaments. These are the methods I tried:
Inkjet print-out on waxed paper, then dampen the ornament and rub picture face down onto it. Didn't work. Very blurry. With less water, the ink didn't come off of the waxed paper.
Inkjet print-out on velum, then hold the ornament over steam and rub the image face down onto the ornament. The image on the ornament was very undefined.
Inkjet print-out on transparency film pre-sprayed with spray hair-gel. Rub image face down onto the ornament. The image on the ornament was again, very undefined.
Inkjet print-out face-down on ornament with rubbing alcohol rubbed on back of paper. No transfer of image at all.
Laser print-out face-down on ornament with rubbing alcohol rubbed on back of paper. No transfer of image at all.
Laser print-out face-down on ornament with acetone rubbed on back of paper. No transfer of image at all.
Laser print-out mod-podged face down on ornament, then (attempted) to remove the paper. Came out a gooey, sticky mess.
Here's the thing about the laser print-outs, though. before going to get laser print-outs of my photos, I tried it out with a laser-printed bill from a utility company. The ink was only black, and it worked on the cold porcelain with both rubbing alcohol and acetone. The color print-outs I got didn't work at all, though. I don't know if it was a different kind of laser printer, or if it was the fact that it was color, but it didn't work.
And the thing I learned about every one of the ink-jet methods is that it worked very well and transfered a nice clear image onto paper or papertowel, so in the future, I could use this on other projects, perhaps, but it doesn't work on cold porcelain.
I gave up on the image transfer bit and decided to just cut the pictures out and glue them onto the ornaments. I wanted to print it onto tissue paper, so it wouldn't be as obvious that it was cut and glued on, so I tried to send a piece of tissue paper that was taped onto a regular sheet of copier paper through my printer. (I assumed that tissue paper isn't stiff enough. Maybe I should have tried it anyway, because then at least I'd know.) But the paper jammed both times.
In the end, I glued laser print-outs onto the ornaments and covered them with another thin layer of glue. If I'd had matte mod-podge, I would have liked to use that, but I didn't want to wait another few days to get it in the mail. I used the laser print-outs because they wouldn't smear when I put the glue on top of them like inkjet prints would.
I still like the results, but I still wish I could have made the image transfer idea work.
Wednesday, December 19, 2012
Spinach Artichoke Dip - Sis 1
I remember the first time I had Spinach Artichoke Dip. Sis 2 brought it to a dinner party at my house and I was smitten. I've ordered it at several different restaurants and been disappointed every time. I think I got Sis 2's recipe, but I changed it a bunch, because that's just how I cook. I used that version for several years, but lately, I've been on a yogurt kick, so I redid the recipe again. It has less fat (I'm not going to pretend it's low-fat, because it isn't, but now it doesn't have a pool of grease on top when you reheat it.) and tastes every bit as good.
Hot Spinach Artichoke Dip
12 oz. plain non-fat yogurt
1/2 cup mayonnaise
1 cup shredded mozzarella cheese, plus more for top
½ cup shredded parmesan cheese
1/8 teaspoon black pepper
3/4 teaspoon salt
½ teaspoon garlic powder
1 tsp. italian seasoning
1 (6.5 or 7 oz--I've used both) bottle marinated artichoke hearts
1 cup chopped frozen spinach, thawed
Preheat oven to 350 degrees farenheit. Mix first 8 ingredients in a large bowl. Drain artichoke hearts, then chop them into 1/2 inch pieces. Now pick them up in your clean hands and squeeze them over the sink, as if you were wringing a dishtowel. They need to be as dry as possible, or your dip will be runny. Put the artichoke hearts into the bowl. Now squeeze the spinach juice out the same way. Stir the artichokes and spinach into the other mixture. Since you squeezed them so hard, they'll be in clumps that need to be broken up.
Spread dip into a loaf pan, pie plate or 8x8 pan. Sprinkle extra mozzarella cheese over the top, just to produce a light layer.
Bake 30 minutes, or until top is bubbly
and golden-brown.
Serve hot with crackers, chips or bruschetta.
Honey Orange Ham - Sis 1
Due to the "Obama Lunches," my children are very reluctant to eat school lunch. They often take sandwiches and I have been buying lunch meat, something I haven't done on a regular basis in years (OK, never.)
I was reading a post by Donna Freedman on MSN Money--I like a lot of her ideas--and was reminded that actual real meat costs less than lunch meat and tastes A LOT better, too. So I bought a ham. The way I cooked it makes it fall-apart tender, though, so I might have to chill it a while before I can slice it thinly for sandwiches.
Honey Orange Peel Ham
the peels from 1 medium orange, in pieces
water
1 ham, bone in is good
1/2 cup honey
Place orange peels in a small saucepan and cover with water. Bring to a boil and drain water. Repeat. (This will take the bitterness out of the peels.)
Pour 1 cup of water into the bottom of a large crockpot. Place the ham inside. Drizzle honey all over the top of the ham. Drop the orange peel over the ham. Put the lid on and cook on the high setting for 6 hours. If you happen to be home, turn the ham over about halfway through cooking.
Remove the ham and strain the orange peels out of the juices. (You can eat them, if you want.) Serve the ham and put the juices (still in the crockpot) in the fridge. I'm using it to make soup for tomorrow.
Chocolate Pie Crust - Sis 1
It's just too easy and cheap to make a chocolate cookie crust. There's no reason to go to the grocery store and buy one. In fact, I would wager that you can have it made in the time it would take you to drive to the store, buy one, and get home.
Chocolate Cookie Pie Crust
3/4 cup light brown sugar, packed
1/4 cup canola or vegetable oil
1 cup all-purpose flour
1/4 cup dutch cocoa powder
1 pinch salt
Preheat oven to 350 degrees farenheit. Mix sugar and oil in a microwave-safe bowl. Microwave 1 minute and stir again. Mix in flour, cocoa and salt. Stir until mixture resembles crumbs. Press into pie plate. Bake about 15 minutes, or until crust appears to be done. (Specific, huh?) Cool and fill with any filling you would normally use in a chocolate cookie crust.
HOT CHOCOLATE ORNAMENT GIFTS- Sis 1
This year for my daughters' friends, we made ornaments filled with cocoa mix. I bought the plastic ornaments from amazon. (I have Prime, and I live in a very small town where I can't find a lot of the things I'd like to buy.) You could probably get them at a craft store like Jo-ann, or, you might even get the clear glass ones and use a funnel to fill them.
I also had to order the ribbon online because I couldn't buy it in town like I thought I could, so these were a bit later than I had hoped. I already had Tulip Slicks fabric paint in assorted colors, but I only used 3, black, red and green. I wrote Each girl's name on a ball and embellished it with holly. (I'm no calligrapher, but the girls are between ages 6 and 11, so I'm hoping they don't mind.)
I let the balls dry overnight, then I filled them with cocoa mix, attached a candycane and instructions with a ribbon, and viola! a yummy, personalized gift for a little girl. For boys, I wouldn't have done their names in cursive, and maybe I'd have drawn snowmen instead.
Hot Cocoa Mix
1 1/2 cups white sugar
1 1/4 cups powdered dry milk
1 1/4 cups non-dairy creamer
1/8 teaspoon salt, scant
3/4 cup dutch cocoa powder
1 large box jello, raspberry or orange, optional
My powdered milk is very fine, like creamer, so I just dumped everything together in a big bowl and mixed it up with a wire whisk. If your powdered milk is coarse, like some is, you may have to use a food processor to make it a nice powder first.
Since I was giving candycanes with my cocoa mix, I didn't add the jello for the girls, but I made another batch with it for our family. Yum!
Mix 3 heaping tablespoons of mix with one cup hot water. Enjoy!
Sunday, August 19, 2012
Chocolate Custard Ice Cream - Sis 2
Do you love ice cream? Especially during the sweltering, hot summer? It has been a sweltering hot summer. So I decided to make some Chocolate Ice Cream to cool us off.
Chocolate Custard Ice Cream
3 cups Sugar
1/4 cup + 1 Tbsp flour
1/2 cup unsweetened cocoa
1/2 tsp salt
8 cups of milk
6 egg yolks
1 tsp vanilla
2 cups heavy whipping cream
In a heavy saucepan combine sugar, flour, cocoa and salt. Then add the milk. Bring to a boil over medium heat, stirring constantly so the milk does not burn on the bottom. Keep stirring and cook for about 8 more min after it boils, or until it thickens up a bit. Remove from heat, and cool slightly.
Beat egg yolks. Then whisk a small amount of the chocolate mixture into the egg yolks to temper them. Add the egg yolks to the rest of the chocolate mixture and cook over low heat until the mixture coats the back of a metal spoon. Remove from heat and stir in the vanilla. Next, pour the chocolate mixture into a large bowl and then put the bowl into a bowl with ice water to cool the mixture off quickly. After it cools for ten minutes in the ice water, remove. Cover the top of the custard with saran wrap, pushing it down onto the top of the custard, so it does not form a skin. Refrigerate for several hours.
When ready to freeze, stir in the cream. Then freeze in ice cream freezer according to the manufacturer's directions.
Note: This ice cream is very rich!!
To make rocky road: just add 2 cups mini marshmallows, 1 1/2 cups mini chocolate chips, and 1 cup chopped almonds after churning in the ice cream freezer.
Chocolate Custard Ice Cream
3 cups Sugar
1/4 cup + 1 Tbsp flour
1/2 cup unsweetened cocoa
1/2 tsp salt
8 cups of milk
6 egg yolks
1 tsp vanilla
2 cups heavy whipping cream
In a heavy saucepan combine sugar, flour, cocoa and salt. Then add the milk. Bring to a boil over medium heat, stirring constantly so the milk does not burn on the bottom. Keep stirring and cook for about 8 more min after it boils, or until it thickens up a bit. Remove from heat, and cool slightly.
Beat egg yolks. Then whisk a small amount of the chocolate mixture into the egg yolks to temper them. Add the egg yolks to the rest of the chocolate mixture and cook over low heat until the mixture coats the back of a metal spoon. Remove from heat and stir in the vanilla. Next, pour the chocolate mixture into a large bowl and then put the bowl into a bowl with ice water to cool the mixture off quickly. After it cools for ten minutes in the ice water, remove. Cover the top of the custard with saran wrap, pushing it down onto the top of the custard, so it does not form a skin. Refrigerate for several hours.
When ready to freeze, stir in the cream. Then freeze in ice cream freezer according to the manufacturer's directions.
Note: This ice cream is very rich!!
To make rocky road: just add 2 cups mini marshmallows, 1 1/2 cups mini chocolate chips, and 1 cup chopped almonds after churning in the ice cream freezer.
Thursday, June 7, 2012
Cashew Chicken Stir-fry
Here is a new recipe I made up tonight. It turned out very good. My husband loved it, and even my kids liked it.
Cashew Chicken Stir- fry
1 lrg chicken breast, cut in small pieces
salt, pepper, garlic powder
3 heads of broccoli, cut into bite sized pieces
1 tsp sugar
1/2 tsp salt
1/2 lb mushrooms, sliced
1 cup beef broth
1 tsp corn starch
1/2 cup salted, roasted cashews
Generously sprinkle salt, pepper and garlic powder over raw chicken. Heat frying pan with 1 tbsp oil over Medium High Heat. Cook chicken pieces in the pan until they are just done. Remove the chicken from the pan and set aside. Add 2 tbsps oil, and the broccoli to the pan. Sprinkle the sugar and salt over the brocolli and stir once. Then add the mushrooms. Stir fry the vegetables until the broccoli is tender/crisp and the mushrooms are tender. Add the beef broth and bring to a boil. Sprinkle the corn starch over the cooked chicken and mix it together, then add the chicken back into the frying pan. Cook the mixture long enough for the sauce to tighten a little bit. Remove from heat and add the cashews. Serve over rice, immediately.
Monday, June 4, 2012
Change Your Attitude - Sis 2
I spent the past weekend in Las Vegas, and let me just tell you, I'm so happy I don't live there. Now, that I got that out of the way, I went to Las Vegas to go to a seminar with my husband. The seminar was called "Mastery Mindset" with Paul Finck, who is a life coach. Some of the information I thought was good, and some of it not as good. But he did talk about one thing that I thought was very good and applicable to me. He said, "Just decide to change your attitude and do it."
Now, this was nothing new to me. I have heard it many times in the past. One time inparticular I remember. When I was in sixth grade I remember one of my teachers putting a slide on a projector. Unfortunately, I do not remember everything the slide said, but it was a quote about changing our attitude. It really had an effect on me, becuase I still remember seeing the slide on the projector screen on the wall. I remember writing the whole quote down and thinking about how I really am in control of my attitude and I can decide whether I am happy or not. This is the first time I remember realizing that I really was in control of my attitude. Now this may seem weird to you, that I had not realized this before. I might have been taught it before, but this was the first time I think it really sunk in.
Bu,t then life happens, and I a somewhat of a pessismistic person and sometimes I need to be reminded of the fact that I can change my attitude by simply deciding to do it.
Now, try an experiment with me. Just SMILE! How does it make you feel? Does it make you feel bad or do you suddenly feel uplifted, or happy, just from smiling?
Let's remember that we can change our attitude about things in our life. We can decide to be happy and find the good things in life.
Now, this was nothing new to me. I have heard it many times in the past. One time inparticular I remember. When I was in sixth grade I remember one of my teachers putting a slide on a projector. Unfortunately, I do not remember everything the slide said, but it was a quote about changing our attitude. It really had an effect on me, becuase I still remember seeing the slide on the projector screen on the wall. I remember writing the whole quote down and thinking about how I really am in control of my attitude and I can decide whether I am happy or not. This is the first time I remember realizing that I really was in control of my attitude. Now this may seem weird to you, that I had not realized this before. I might have been taught it before, but this was the first time I think it really sunk in.
Bu,t then life happens, and I a somewhat of a pessismistic person and sometimes I need to be reminded of the fact that I can change my attitude by simply deciding to do it.
Now, try an experiment with me. Just SMILE! How does it make you feel? Does it make you feel bad or do you suddenly feel uplifted, or happy, just from smiling?
Let's remember that we can change our attitude about things in our life. We can decide to be happy and find the good things in life.
Tuesday, May 29, 2012
German Pancakes
I had not made German Pancakes for years, but then one day I was looking through my cookbooks trying to find something to make for dinner and I found a recipe for German Pancakes. As I remember I didn't make the pancakes for dinner, but I made them the next morning for breakfast. My kids LOVED them. My six year old especially loves them, and asks for them about once a week now.
If you are wondering what German Pancakes are; they are made from an egg based batter, poured into a 9x13 pan and baked in the oven. They come out fluffy, puffy and golden brown.
I also have a recipe for maple syrup. I bought some pure maple syrup from Costco one time, but my kids wouldn't eat it and my husband did not like it either. So I just make this fake maple syrup. It is very easy to make, my kids like it, and it doesn't have High Fructose Corn Syrup in it like all the syrups you buy at the store. It does have lots of sugar though.
Here is the recipe. I have changed the recipe a bit, from the one I found, but I got the original recipe from a cook book by Nancy Kimmerle.
German Pancakes
3 Tbsp Butter
6 eggs
1 cup milk
1 cup flour
1/2 tsp salt
1 tsp vanilla
1/4 cup sugar
Preheat oven to 400. Put butter in a 9x13 pan, while the oven is heating up put the pan in the oven to melt the butter. Put the rest of the ingredients in a blender and blend well. Scrape the sides of the blender with a rubber spatula and then blend again for 2 min. Pour the batter into the 9x13 pan and bake for 25 min or until golden brown on top and sides. Serve with syrup.
Fake Maple Syrup
3 cups sugar
2 cups water
1 1/2 tsp mapleine (This is imitation maple flavoring)
1/2 tsp butter flavoring (You can find this and the mapleine by the extracts at a grocery store.)
Combine all the ingredients in a saucepan and bring just to a boil over med heat. Remove from heat and then use on pancakes. This makes a lot of syrup, so I put it in a store bought syrup bottle and store it in the fridge.
Friday, May 18, 2012
Teacher Gifts - Sis 1
Our family has been going to the best school in Tooele for 5 years, and this is our last. I do have fond memories of the school the kids will be going to next year, but we will miss Northlake (the people there, really) SO much. I have volunteered quite a bit at the school, more in the past than recently, because of Bear, but I am always in awe of the wonderful teachers my children have had.
There's really nothing that would come close to thanking teachers for all of the work, inspiration, and dedication they put in and sometimes the heartache that they go through, but I'm sure they knew that when they started on the teaching path.
So, here's the insignificant little gift that I chose to give to our teachers this year.
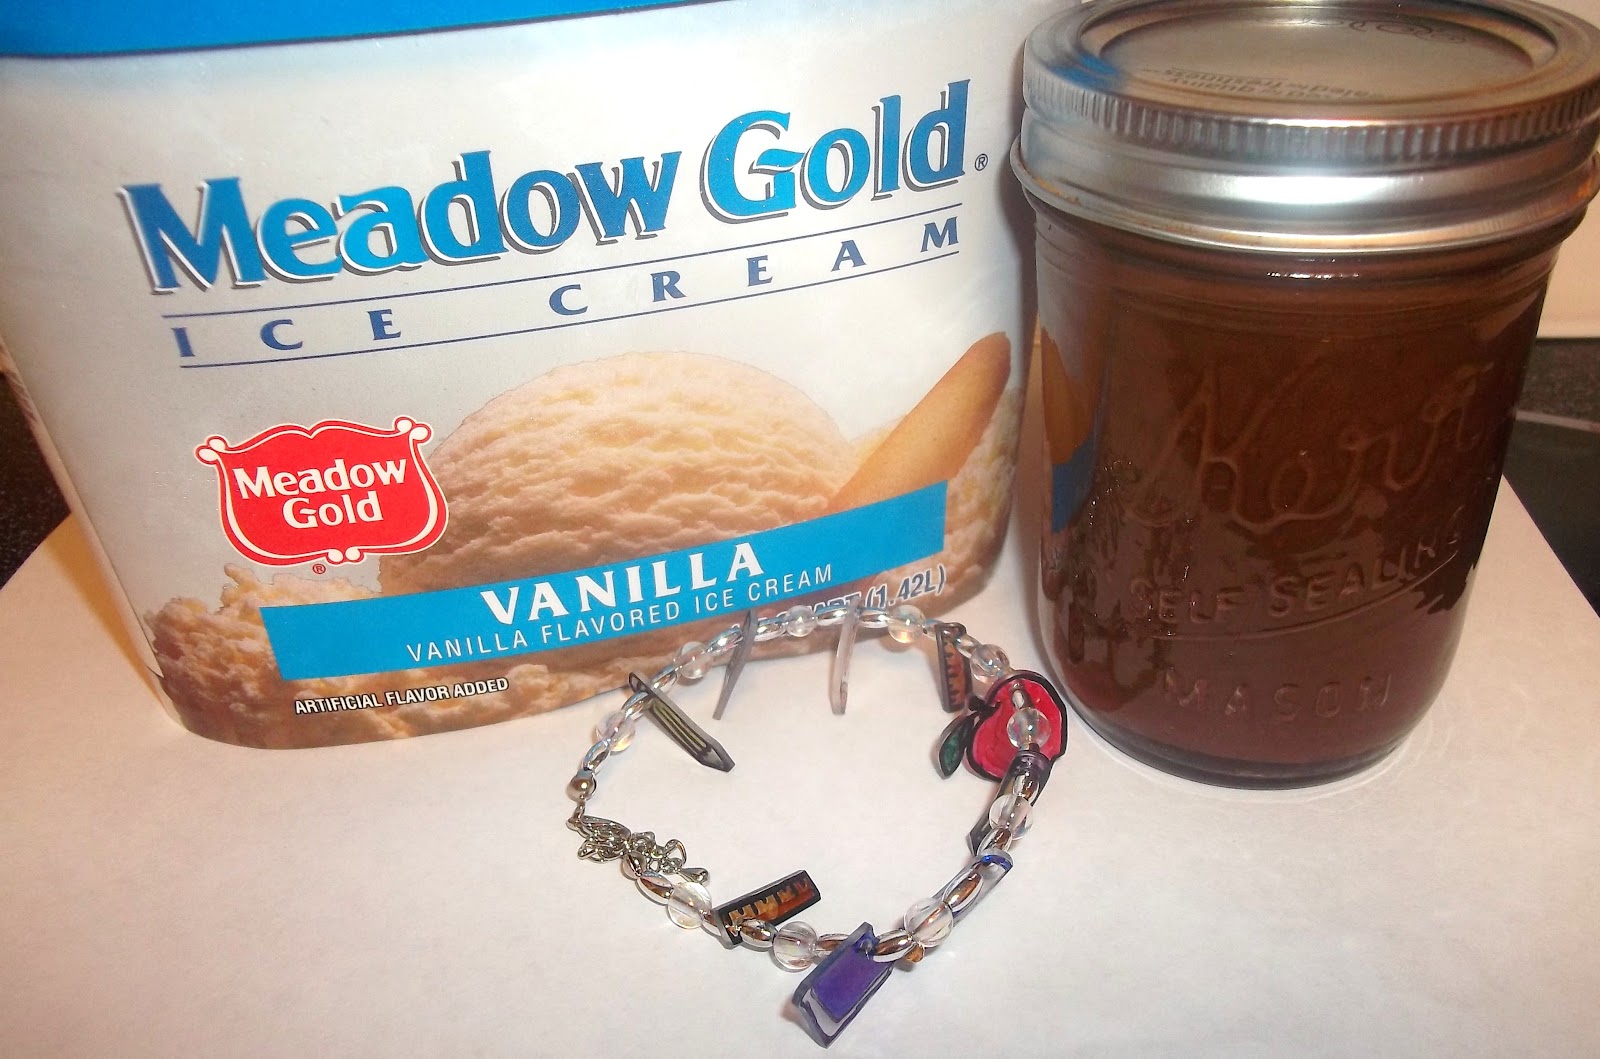
School Supplies Bracelets
Materials needed:
#6 recycleable plastic*
permanent markers of many colors
scissors
hole punch
beads
string and findings
Here are the patterns I had my kids trace and color. Feel free to use them (Click and drag onto your desktop or right click and save as). Before shrinking, they were each up to 2 inches in the longest direction.
Spread the shapes on a cookie sheet or pan, making sure none of the shapes touch each other. We baked our shapes one child's set at a time, so that they wouldn't get mixed together. Place pan in the oven and turn on the light. After about 5 minutes, check to see if the shapes have shrunken. If not, just wait longer. If they're curling a lot, they're in the process of shrinking. Once the shapes are mostly flat, remove them from the oven. If you want to flatten them NOW is the time.
When cooled enough, remove from pan and string, along with other beads to make a bracelet.
* #6 plastic is polystyrene, which is the same material styrofoam is made from. I collect the lids from any trips we make to Costa Vida or Cafe Rio (always get a to-go lid) and the lids of disposable casserole pans from the dollar store. You can still use the pan when you're taking dinner to someone. Just cover it with tinfoil and keep the lid for your projects. Some deli containers and plastic cups are also #6 plastic. Look for the recycle triangle with a 6 or PS underneath. Don't use any other number. It won't work. Just wash your used plastic by hand, dry it, and store it for later. The vertical sides can be used for fun things, too, but it's much easier to trace pictures if you have already cut them off.
Hot Fudge Sauce
Ingredients:
1 14 oz. can sweetened condensed milk
3/4 cup semi-sweet chocolate chips
1 1/2 teaspoons vanilla
Combine all ingredients in a small saucepan. Heat on medium-low heat, stirring occasionally until the chocolate is all melted and the mixture is smooth. Pour into 1/2 pint jars, if using as a gift. You could make cutesy lids, too. I didn't.
Reheat in the microwave and serve on ice cream. (Or, you can get a clean spoon and sneak a bite right from the container in the fridge, like I usually do.)
Thursday, May 17, 2012
Chicken Caprese Pasta
1/2 pound pasta
5 chicken tenders
1/2 red bell pepper, chopped
1/4 cup fresh basil, chopped
5 roma tomatoes, chopped
2 Tbsp olive oil
1/2 tsp salt
1/2 tsp pepper
1 1/4 tsp garlic powder, divided
1 cup mayo
1 1/4 cups mozarella cheese
1 cup parmesan cheese
1/2 cup chicken stock
Bring a pot of water to a boil, add some salt and the pasta. Boil pasta until al dente, and then drain and rinse with cold water. Heat a frying pan and 2 Tbsp oil. Sprinkle the chicken generously with salt, pepper and garlic powder, and cook the chicken in the frying pan. In a small mixing bowl mix the tomatoes, basil, olive oil, salt and pepper and 1/2 tsp garlic powder, and just let it sit.
Mix the mayo, 3/4 tsp garlic powder, chicken stock, 1 cup mozarella and 3/4 cup parmesan together. Then mix the sauce, pasta, chicken and peppers together. Put into a 9x13x2 baking dish and sprinkle with the remaining parmesan and mozarella cheeses. Bake at 350 for 30 min. Serve with the basil, tomato mixture on top.
Enjoy.
Super Easy Cream Cheese Pie - Sis 1
Super Easy Cream Cheese Pie
Crust:
1/3 cup butter, melted
1/4 cup brown sugar
1/2 cup roasted almonds, blended*
1/2 cup whole wheat flour
Filling:
8 oz. cream cheese, softened
1/2 cup powdered sugar
1 1/2 cups lowfat vanilla yogurt
Preheat oven to 375 degrees Farenheit. Mix crust ingredients in a small bowl and press into a greased 9-inch pie plate. Bake about 12 minutes, or until slightly browned. Allow to cool completely.
With a hand mixer, blend together cream cheese and powdered sugar. It is very important that you do this step first. If you add the yogurt before mixing the cream cheese with the powdered sugar, you will never get all of the lumps out. Add yogurt and beat on high speed until stiff peaks form. Pour into pie crust and chill at least 2 hours. Top with fruit pie filling of your choice.
*Place roasted almonds in your blender and pulse until they resemble coarse flour. If your almonds are unsalted, add a couple of pinches of salt to the crust.
Tuesday, May 15, 2012
Cheater Pasta Salad - Sis 1
Last night, we met up for a niece's birthday party. Sis 3 lives a great distance from the rest of us, so she couldn't be there, but the rest of us were, along with one of our brothers. Everyone loved the hamburgers that Sis 2 made and her husband grilled, so hopefully, she'll let us in on her secrets.
Our brother and Sis 2's husband both said that they usually do not care for pasta salads, but that the one I took was very good. My own DH agreed. Several people said they wanted the recipe. The trouble is that I completely cheated, again, but in the interest of helping other people cheat and get away with it, here's what I did.
I had two pasta salad mixes on hand: a Kraft Classic Italian and a Betty Crocker Caesar pasta salad mix. I boiled the pasta from both mixes until they were al dente, then I drained the water and replaced it with ice cold water. Once the pasta was cold, I drained the water again and added:
3 medium tomatoes, diced
1/2 cup finely chopped onion
1 can whole olives, drained
1 can marinated artichoke hearts, drained
about a 2-inch stack of sliced pepperoni, cut into bite-sized pieces
I dumped both seasoning packets from the salad mixes into a small bowl and mixed them with a cup of from-a-bottle italian salad dressing. I didn't put the dressing on the salad until I got to the party, because I've found that the longer a pasta salad sits, the more the pasta absorbs the dressing. You might think that the flavor would be stronger in this case, but the opposite is true. So, never add the dressing until the last minute.
I got away with taking a cheater pasta salad to a function, and so can you.
Subscribe to:
Posts (Atom)